Tag Archives: Healthy Recipes

Luka’s Healthy Dairy-Free Coconut Pancakes

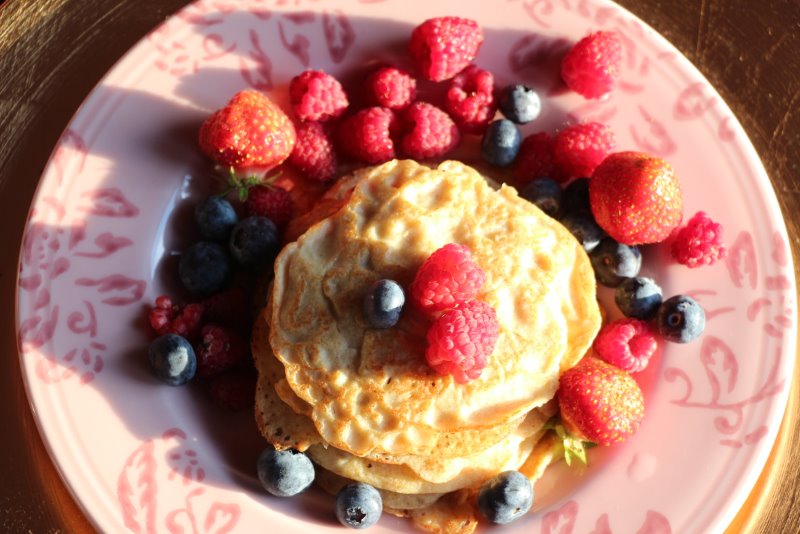
Healthy Dairy-Free PancakesLuka Leana

“Regular” pancakes are typically fried and made with wheat flour and milk which makes them rather unhealthy and hard to digest.

My children both adore pancakes (me too :)) and I have been struggling for a long time to find a healthier alternative.

Here is my recipe that is dairy-free and “bad gluten”-free.

Instead I use the spelt flour, coconut flour (optional), coconut milk and coconut oil. You will notice that you will not experience a typical “weight” in your stomach that is common after eating the pancakes made with wheat’s flour and cow’s milk.

For those new to spelt: spelt does contain gluten but the gluten in spelt has a different molecular make-up and the body handles it easier than the wheat’s gluten (a sticky substance with a consistency like glue which is difficult to digest). Spelt is tolerated better than wheat, however as spelt does contain gluten, it is unsuitable for people with a true gluten allergy.

IMG_7301Ingredients

  • 400-500ml of coconut milk
  • 3 eggs
  • Flour (1/3 coconut flour (optional), 2/3 spelt)
  • Water

This mix will make about 3-4 servings.

IMG_7305Steps

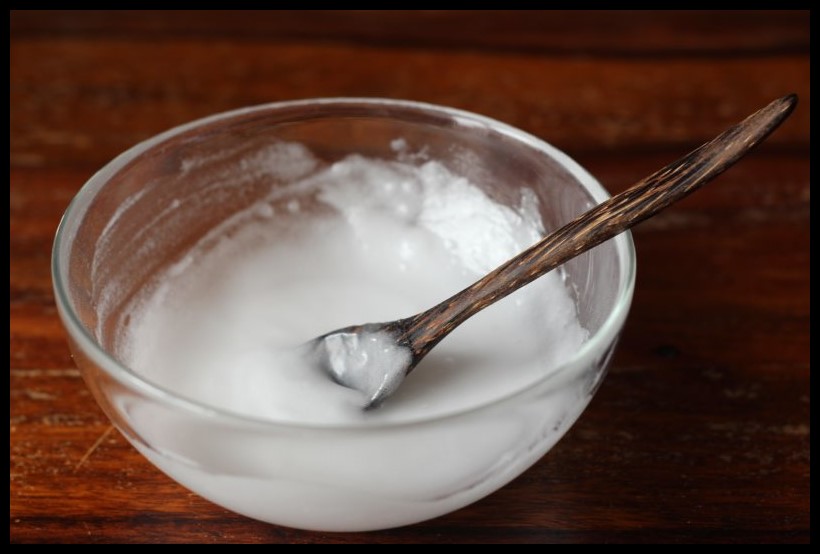
    • In a small bowl mix gently coconut milk and eggs.
    • Slowly add the spelt flour. I never measure the flour, but it must be somewhere around 4-5 cups.
    • Use a wooden spoon and mix until a nice consistency is reached similar to that of a “regular” pancake mix.
    • Add some water at the end. Try not to “over-mix”.

Note: This kind of pancake mix breaks easily during the flipping as there is not enough gluten to keep it together. This is especially true if you are NOT using the dangerous non-stick skillet. The “secret” is then to make smaller pancakes looking similar to American pancakes.

    • Heat a larger skillet over medium heat, and coat with 5ml of coconut oil.
    • Pour in the pancakes. You should be able to fit 3 to 4 pancakes. This is important, otherwise if you make one big pancake, it may be challenging to flip it.
    • Flip with a thin spatula, brown on both sides and serve hot.
    • Enjoy your healthy pancakes  🙂 

Lower Your Risk of Breast Cancer by Using EASY DIY Deodorant

All-Natural EASY DIY Deodorant That Really Works

Lower Your Risk of Breast Cancer by Using EASY DIY Deodorant

Commercially available deodorants are packed with dangerous toxins, cancerogenic substances and endocrine disruptors.

Unfortunately, even hen the label says ALL NATURAL and/or ORGANIC, the product may still contain some controversial ingredients.

The rule is – if you can’t pronounce even one of the ingredients it is most likely unsafe to use it!

Also note that antiperspirants likely contain aluminum, and that aluminum may be absorbed and deposited into your breast tissue and significantly increase your risk of breast cancer!

Fortunately there are safer alternatives, simple and easy to make at home, that really work and do not cost a fortune.

My favorite is to mix some coconut oil with a small amount of baking soda (make sure you use pure sodium bicarbonate!) and add the few drops of essential oils.

If you are really not into making it yourself you can order it here CREAM DEODORANT 100% PURE & TOXIN FREE

Preparation Time

  • 5 minutes

Ingredients

  • Lower Your Risk of Breast Cancer by Using EASY DIY Deodorant  2 tablespoons of coconut oil
  • A pinch of sodium bicarbonate
  • 2-4 teaspoons of arrowroot powder
  • Few drops of essential oils. Tea tree or lavender or geranium  are some good options

Steps

  1. Mix vigorously in a glass recipient all of the ingredients.
  2. Add few drops of your favorite essential oils. I normally add a drop of tea tree oil (anti-bacterial, anti-viral) and a drop of lavender or patchouli essential oil for scent.
  3. Pour it in a glass container with a lid and store at the room temperature (or put it in the fridge if it is too warm).  This preparation has a long shelf time – just make sure you don’t touch it with wet fingers.
  4. To apply: rub a TINY amount in using your fingertips. Allow your skin couple of minutes to absorb in order to avoid the oil stains on your clothes. If it does not work the very first day, be patient – your skin sometimes needs up to a week to adapt.

Caution

Lower Your Risk of Breast Cancer by Using EASY DIY Deodorant  Remember to avoid citrus essential oils during the  summer months as they may cause the dark spots on your skin.

  1. Always use glass or stainless steel recipients and utensils when using the essential oils as they may interact with plastic and some metals.
  2. If you have sensitive skin, please note that sodium bicarbonate may cause irritations due to its ph that is different from ph of our skin, so skip it or use even smaller amount of sodium bicarbonate and use more of the arrow root powder and essential oils. Keep essential oils to 2% of the total weight. Always consult an aroma-therapist or your doctor about essential oils usage and safety.

Voilà – that’s really it.

Food On, Love In & Out 🙂

All Natural Sun Tanning Oil

DIY sun tanning oil 1Carrots & Coffee Sun Tanning Oil Recipe

This sun tanning oil attracts the sunlight and it is quite effective. However, please note that it offers very limited SPF protection and it is best to be used together with the sunscreen. Step 1. Chop up two medium size carrots and add 300ml (two cups) of filtered water. Simmer the carrots for about 30 minutes until they are soft. Step 2. Add 4-5 teaspoons of instant coffee to the pot, stir in and simmer for 10-12 minutes. DIY sun tanning oil 2Step 3. When cooled completely, pour the mixture through the strainer and discard the carrots. Step 4. Add around 150ml of oil(s) to the liquid. Olive oil, hazelnut oil, walnut oil and almond sweet baby oil are all great. You can add of any of these oils or mix them to your liking.DIY sun tanning oil Before going out you can also drink some freshly pressed carrot juice to increase the effect 🙂 This Sun Tanning Oil will keep for about 2-3 months. Refrigerate for maximum freshness. Do not use oils that smell rancid.

https://www.etsy.com/listing/232929647/under-the-sun-nourishing-sun-tanning-oilIf you are too busy and not into DIY, we can make it for you. Here is a link to UNDER THE SUN – 100% Organic Nourishing Sun Tanning Oil – a fine blend of 10 different oils all known for many of their virtues in protecting, nourishing and rejuvenating the skin and, of course, for speeding up the tanning 🙂

Caution!

  • It’s suggested to put a layer of sunscreen under the tanning oil to prevent serious sunburn.
  • Make sure you put the sunscreen first. Click here for Natural Quick Sunscreen Recipe. When the sunscreen is fully absorbed by your skin (it takes around 20 minutes) you can apply a thin layer of your home-made sun tanning oil.
  • Be careful and watch out closely for signs of sunburn! This oil should not be used for fair skin.
  • This Sun Tanning oil is not waterproof, so be sure to reapply after swimming.
  • Choose a designated towel you don’t mind staining up.

Food On, Looking Great 🙂